Adventure sharing · upload guide
How to upload your world with Adventure Sharing
Open Adventure Sharing → My Uploads → Create New and choose your local world. Add a world name, tags, description and at least one screenshot taken with the game’s Camera. Read the Terms of Use, choose your marketing-use preference, then select Create. Without a screenshot, the shown form cannot complete the upload.
For Adventure Sharing introduced in the released Update 8. Images show Keen Games’ April 17, 2026 demonstration; the April 21 release notes confirm the feature.
Prepare the world and its visitor starting point
Adventure Sharing uploads a world. It is not a building blueprint that a visitor can paste into an existing survival save. Prepare the world you want people to explore, rather than selecting only one house.
You can choose one Flame Altar in the world as the visitor starting point using its toggle. Update 8 supports this starting point in peer-to-peer and dedicated-server worlds. Place it where a visitor can immediately understand the entrance and route.
The camera pictures and the visitor starting point solve different problems: pictures help people decide to open the world; the altar controls where their tour begins.
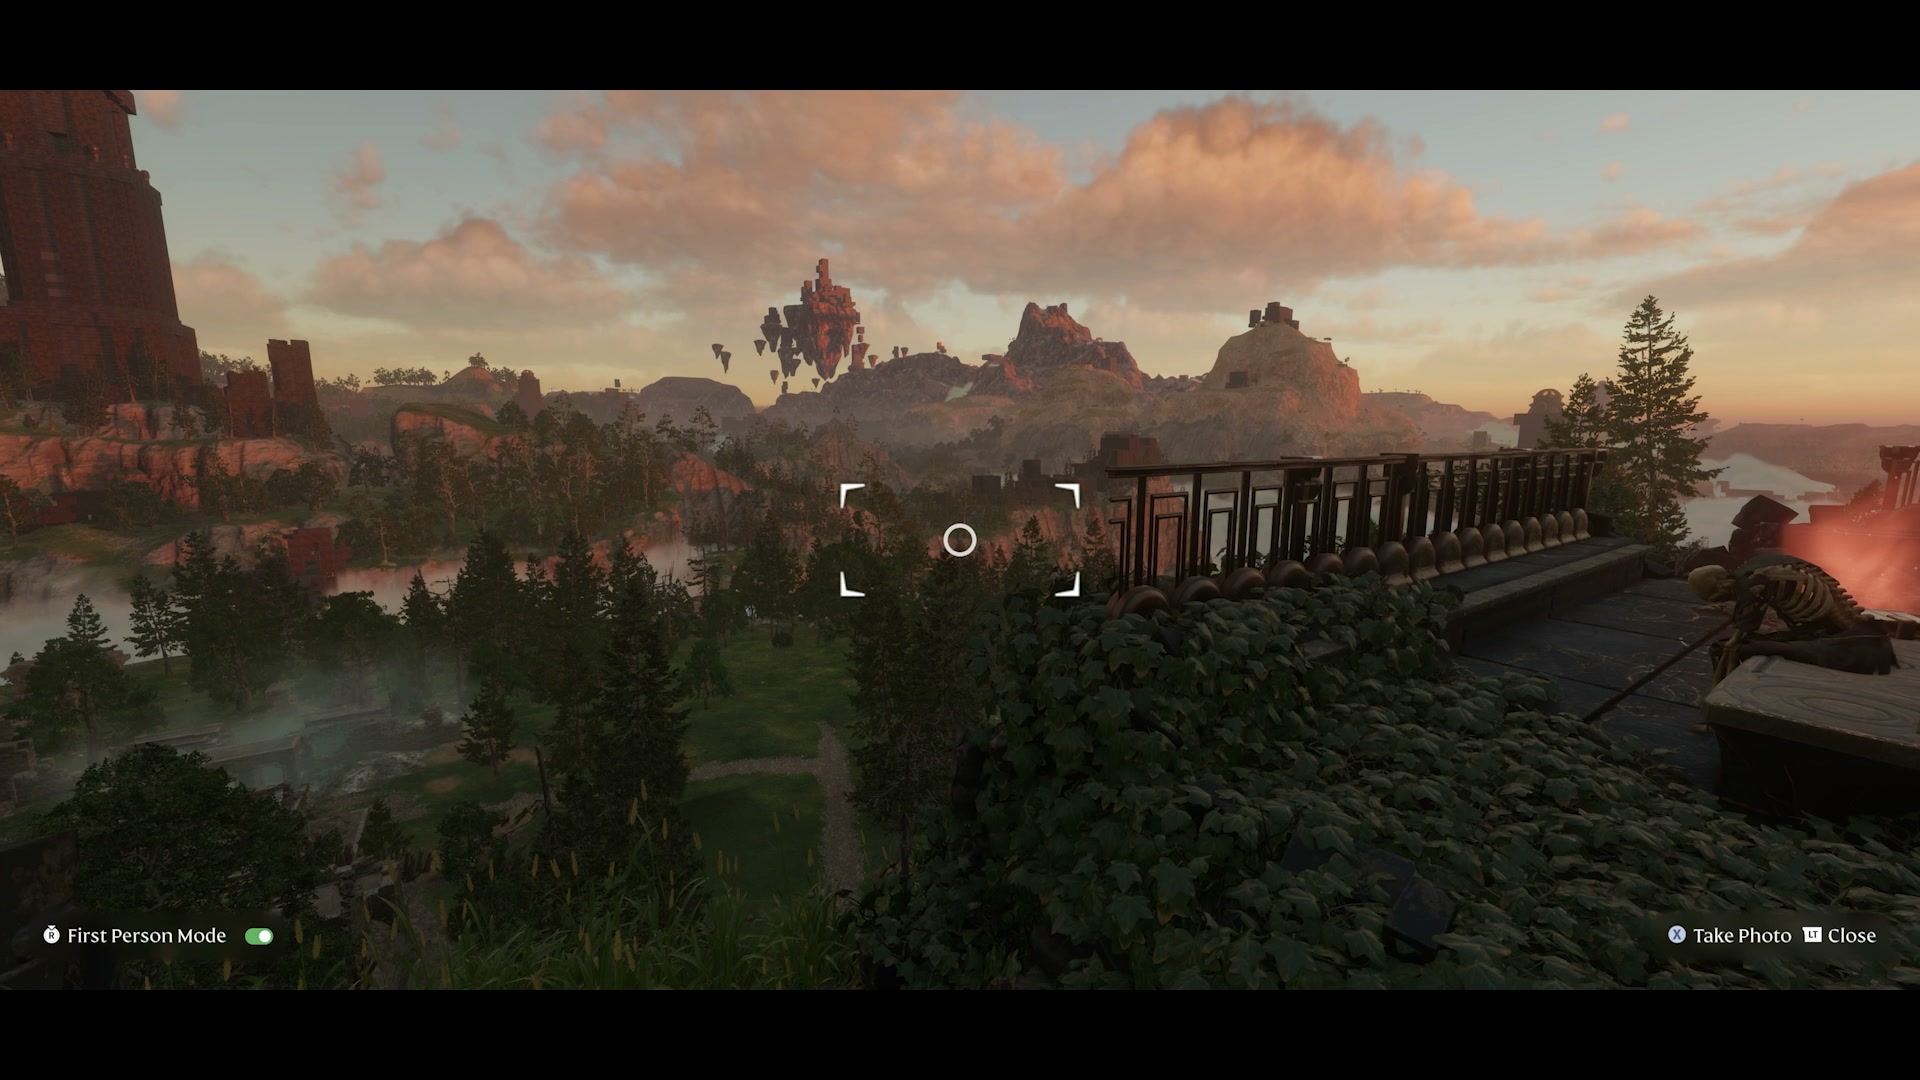
Take at least one preview image with the Camera
The new Camera is crafted at the Workbench. Use it in the world to take the screenshots for your upload.
At least one image is required. For a useful preview, take a clear view of the main build; an entrance or route image can help visitors recognize where to start.
 Open full-size image
 Choose in-game Camera images that represent the world people will actually visit.
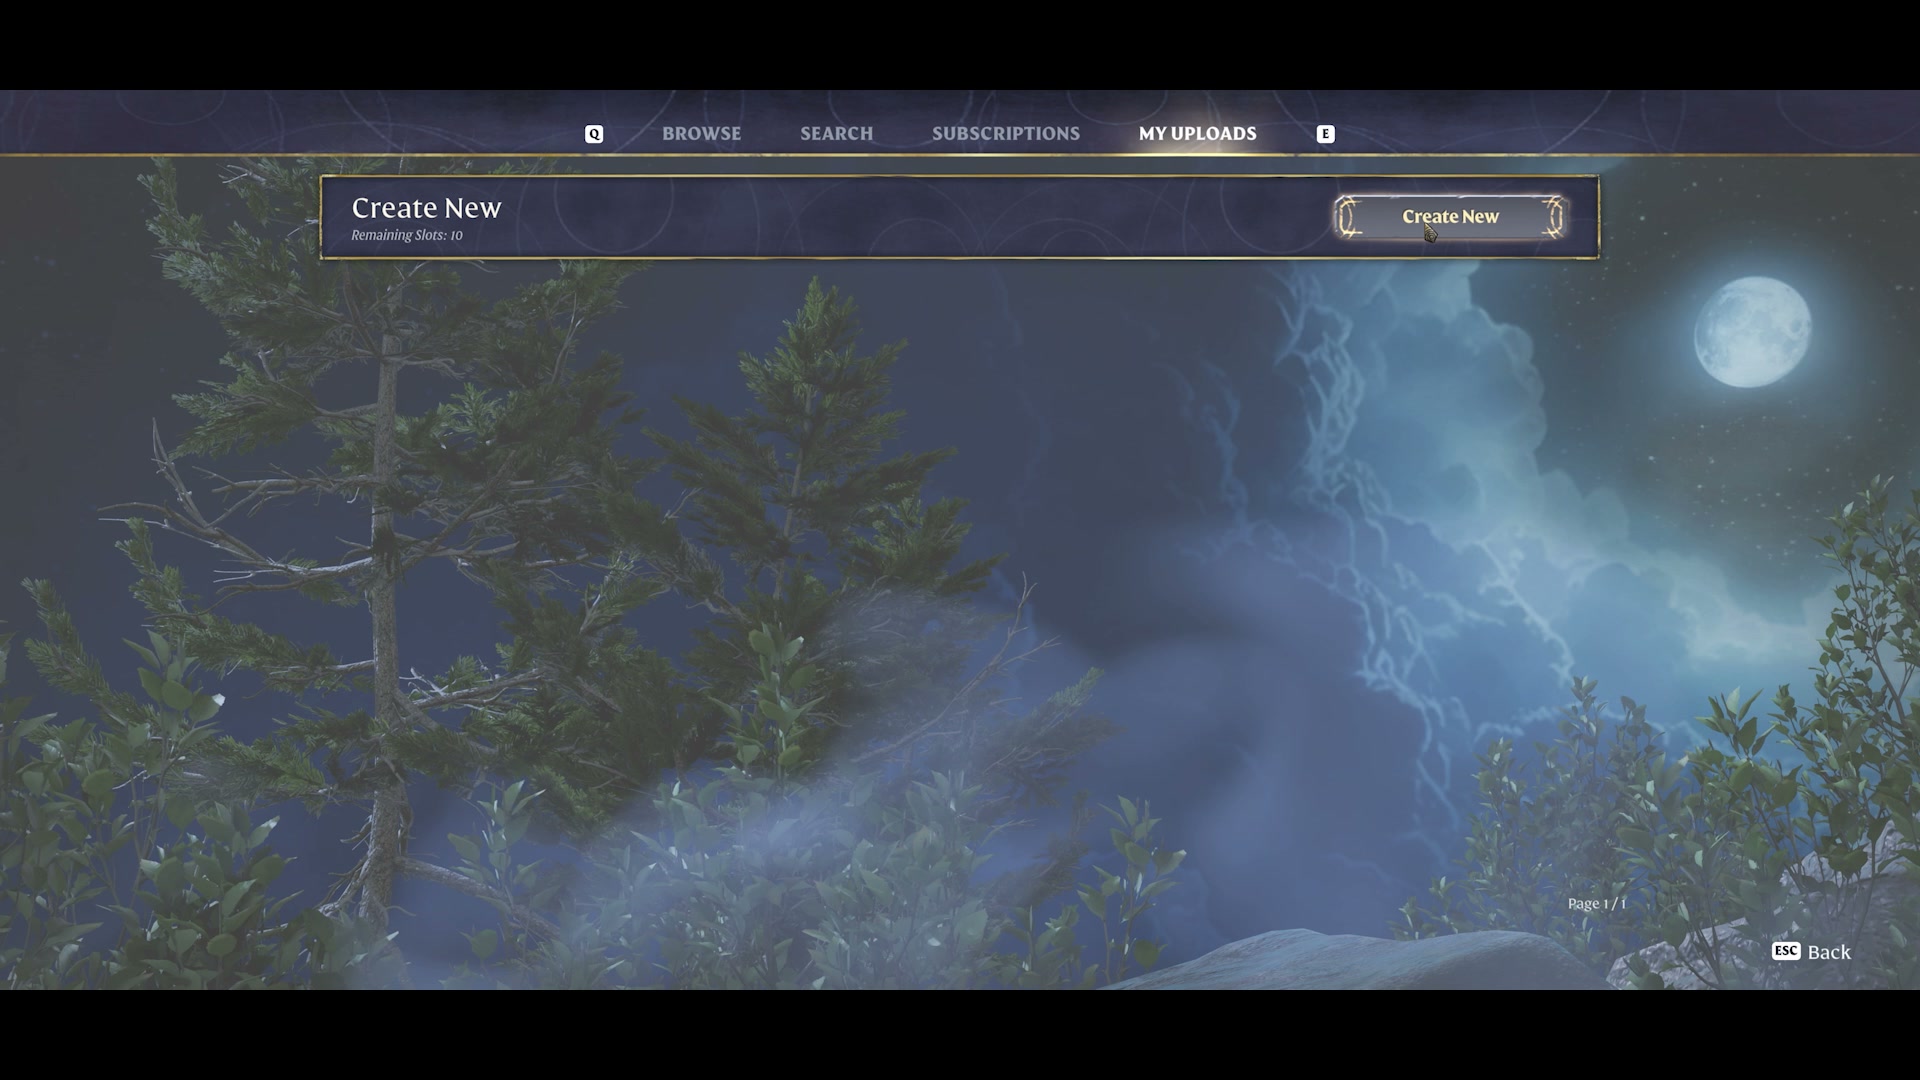
Open My Uploads and choose Create New
- Open Adventure Sharing from the game’s play flow.
- Select the My Uploads tab.
- Select Create New.
- Choose the local world you want to share.
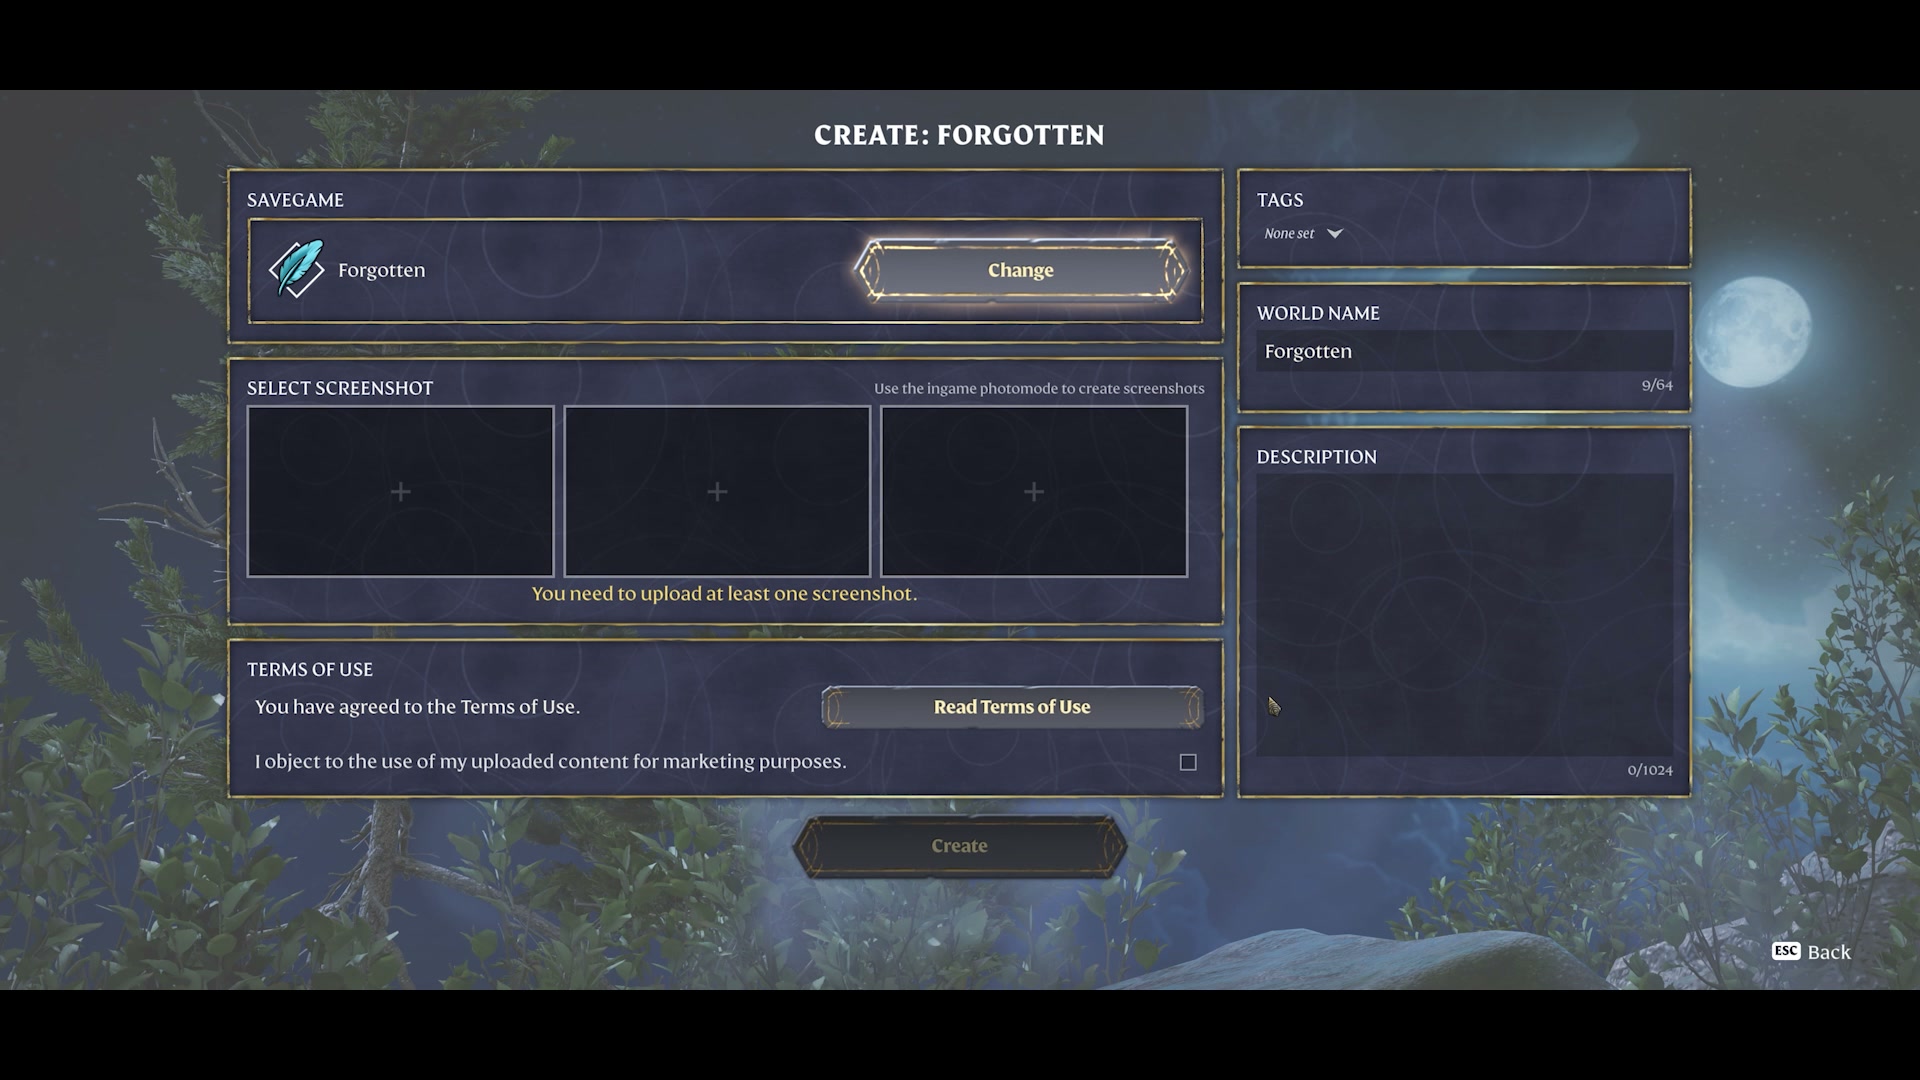
Complete the listing before selecting Create
- Check the selected Savegame; use Change if it is the wrong world.
- Set the World Name, relevant Tags and a clear Description.
- Select at least one of your in-game Camera screenshots.
- Read the Terms of Use. The form also has an option to object to marketing use of uploaded content; choose according to your own preference.
- Once the required information is ready, select Create.
 Open full-size image
 Describe what the visitor will find and where to begin. For example, identify whether the world is a settlement tour, a castle build or another type of creation; do not promise interactions that the current visiting mode cannot provide.
If Create is unavailable, check the screenshot requirement
Take an image with the Camera and select it in the form. Merely giving the world a name does not satisfy the image requirement. If the form is still incomplete, check the selected world and remaining fields shown there.
Design the first minute of the visitor’s tour
Consider the route from your chosen visitor altar to the main build.
Keep the arrival area clear, make the intended entrance easy to spot and use your description or preview images to explain the tour. A screenshot of a distant landmark is less helpful if the visitor begins facing an unrelated wall.
Update 8 visiting is sightseeing: visitors cannot pick up items, interact with enemies or earn XP. Plan the tour around what people can see.
Sources and version
- Keen Games — Update 8 release notes, April 21, 2026
- Official Adventure Sharing demonstration — upload process at 1:57
- Official demonstration — how visitors open an adventure at 1:26
The images come from the April 17 official demonstration. This guide combines that identifiable UI with the released Update 8 rules; it does not claim a test of unreleased 1.0 features.